Tuesday, 28 February 2012

The Result Alarm

Ever got tensed or wondered when the heck is result gonna come out ? Well , I am currently studying in Mumbai University and I am never sure when the results come out , actually MU(Mumbai University) prefers to launch the results at the unexpected time of the day , when no one in the world would dare to think .

So , as one of the nerd/lazy student of my college , I got a very stupid yet interesting idea(well , i believe that laziness is something that helps  for mental improvement), why not write a script to check for the results ? And as stupid it might sound , its incredibly simple if you use some language like Python . So here's what I did :
Generally , result links are dynamic , but the webpage to that link are static and are updated when they launch the results , so considering this -  I made a simple python script that would sound a alarm on my laptop and email me when the results are out .

So , here's the code , the code is pretty self explanatory (with the comments)


import urllib2 # used for getting the exam result url
import re # Regular expressions , used for comparing the last updated date with the current updated date
import time # for sleeping
import smtplib # for sending emailsm
from pygame import mixer # used for playing sounds 
from email.mime.text import MIMEText # for composing the email to send 


resultUrl='http://mu.ac.in/res_be7r.html' # the url address where the results are expected to be updated 
while (1==1): # while true , infinite loop :)
  f=urllib2.urlopen(resultUrl) # request the url
  metaInfo=f.info(); # get webpage info , specifically last update info 
  match=re.search('Last-Modified: Sat, 25 Feb 2012 15:14:03 GMT',str(metaInfo)) # compare with last modified info ( as per you last webpage visit 
  if(match==None): # ie , the result webpage has been updated (TENSED .... :( :( )
    mixer.init() #you must initialize the mixer
    alert=mixer.Sound('/home/tapan/COWBELL.WAV') # initialize the sound to be played as alarm
    fromaddr = 'tapan.genius@gmail.com'   # from addr  
    toaddrs  = 'tapan.terna@gmail.com'  # to addr
    msg = MIMEText('The results seem to be updated , please check!!')
    msg['Subject']='RESULTS!!!!!'
    # Credentials (if needed)  
    username = 'tapan.genius@gmail.com'  # email id from which the email should be sent 
    password = '***********' # you password 
  
    # The actual mail send  
    server = smtplib.SMTP('smtp.gmail.com:587')  
    server.starttls()  
    server.login(username,password)  
    server.sendmail(fromaddr, toaddrs, msg.as_string()) 
    server.sendmail(fromaddr,'aankitt.jain@yahoo.com', msg.as_string()) 
    server.quit() 
    while (1==1):
      alert.play()
      time.sleep(1)
  print('results are not yet out')
  time.sleep(120) # wait for 2 mins and check again . 

Ps : I am drunk right now , so please forgive my typing/grammatical mistakes (Actually results came and and i FAILED :( )
Friday, 25 November 2011

Android Boot Broadcast Receiver

Android has something call broadcasts , broadcasts are android's way of implementing OS/Phone events like


  1. Android boot is completed
  2. Android charger is plugged in 
  3. Android charger is disconnected
  4. Android is powered off 
  5. Android time-zone is changed
So , broadcasts can really help us in making out applications function to any ans even more of the above events .
So , for the sake of this tutorial we will be seeing only the Boot completed broadcast event . For this  we follow  the following steps :

  1. Add permission to receive boot completed broadcast in AndroidManifest.xml
  2. Add a receiver to receive the broadcast event AndroidManifest.xml
  3. Implement the receiver
STEP 1

Adding permission to get the boot completed broadcast is simple , just add the following in the android manifest file 


Here , instead of android.permission.RECEIVE_BOOT_COMPLETED you can add other broadcast receivers , for more broadcast receivers you can refer here .

STEP 2
Add the following in android manifest :


Here , BootReceiver is the class that will be called when we receive the Boot Completed broadcast .

STEP 3
Last task is to implement the receiver that is create a class that extends BroadcastReceiver
Look at the following code , its self explanatory :

public class BootReceiver extends BroadcastReceiver 
{
 // Do the stuff when the android has booted
 @Override
 public void onReceive(Context context, Intent intent) {
  
  Toast.makeText(context, "Greetings from Tapan Thaker", Toast.LENGTH_LONG).show();
  //Log it
     Log.d("Boot Receiver","The Broadcard event has been received");
 }

}
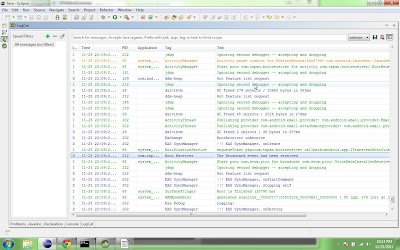
And now , some snapshots :)


You can see the action performed by our application (ie logging )

You can find the project file HERE

Thursday, 24 November 2011

Using Preferences with Android

What is preferences in Android ?

Well preferences is Android's way of saving the applications setting .
So the next question that might arise in your mind is :

Why use android's preferences , instead of that why not same the settings in my own file  ??

Well there are several reasons for using android's built-in preferences

  1. It is simple (instead of using extra data file handelling )
  2. The UI is the same as android's settings , so it is intuitive and user friendly to the end user
  3. No need to define external permissions in the android manifest file , thus your application will not use extra not permissions 
So , the 2 questions - What and Why is covered , the next question that arises is How to use it ? Which is also quiet simple . As I feel , android has taken good care that its developers find it easy and powerful to develop applications . Lets now directly start trying preferences - 

Using preferences can be summed up in the following steps :

  1. Create a preferences.xml file in  res/xml 
  2. Create a Mypreference class that extends PreferencActivity 
  3. Create a button in main activity that will call the MyPreference Activity
  4. Display the preferences in the main activity
STEP 1

In the res/xml create a preference.xml , the preference.xml file will hold the different settings name , the settings/preferences can be grouped together , a preference can be a checkbox preference , edittext preference or a list preference , we can also define a customized preference ( will be studied later ) by extending the Preference class . Well , so the preference.xml file will look like the following :


Well , now lets guide you through the terms involved  which are not directly understandable :


  • android:key - which will be used to access preferences for other activities 
  • android:defaultValue - which will the value when the application is first installed
  • android:inputType - the input type of the softkey board , if you want to type number then use the input type as phone 
  • android:entries - well this contains the entries , which can be got from a xml file , in the above case the xml filename is array which is presents in /res/values/arrays.xml which is defined as below :


    option 1
    option 2
 option 3
 option 4
 option 5
 option 6
    

Note :

  1.  Please do not confuse the filename arrays.xml with the @array/myoptions , array here is because it is defined as a  string-array in the xml
STEP 2
Next task is simpler , create a MyPreference class which extends PreferenceActivity as below :
package com.tapan.PreferencesExample;

import android.os.Bundle;
import android.preference.PreferenceActivity;

public class MyPreference extends PreferenceActivity
{
@Override
protected void onCreate(Bundle savedInstanceState) {
 super.onCreate(savedInstanceState);
 addPreferencesFromResource(R.xml.preference);
}
}
Please remember to add the following line to the AndroidManifest.xml

STEP 3 & 4

As for both the steps we are dealing with only one Activity ie the main Activity , I decided to combine both the steps . For this I have written the java code which is pretty self explanatory :


package com.tapan.PreferencesExample;

import android.app.Activity;
import android.content.Intent;
import android.content.SharedPreferences;
import android.os.Bundle;
import android.preference.PreferenceManager;
import android.view.View;
import android.view.View.OnClickListener;
import android.widget.Button;
import android.widget.TextView;

public class PreferencesExampleActivity extends Activity {
    SharedPreferences sharedPreferences;
 
 /** Called when the activity is first created. */
    @Override
    public void onCreate(Bundle savedInstanceState) {
        super.onCreate(savedInstanceState);
        setContentView(R.layout.main);
        
        Button b=(Button) findViewById(R.id.button1);
        b.setOnClickListener(new OnClickListener() {
   
   @Override
   public void onClick(View v) {
    // Call the MyPreference Activity when the Button is clicked 
    Intent i=new Intent(PreferencesExampleActivity.this,MyPreference.class);
    startActivity(i);
   }
  });
    }

    /* Called When the Activity is resumed 
     * It will be used to refresh the preferences list
     * Also called when the activity is first created
     * */
    @Override
 protected void onResume() {
  super.onResume();
  TextView tv=(TextView)findViewById(R.id.PrefrencesText);
  // Getting the shared preferences 
  sharedPreferences= PreferenceManager.getDefaultSharedPreferences(PreferencesExampleActivity.this);
        
  // Getting the EditText preference( android:key="etpreference")
  String etpref=sharedPreferences.getString("etpreference","" );
  
  // Getting the Checked preference( android:key="cpreference")
  String cpref=Boolean.toString(sharedPreferences.getBoolean("cpreference", false));
  
  // Getting the List  preference( android:key="opreference")
  String opref=sharedPreferences.getString("opreference", "");
        tv.setText("The preferences are- \nEditText preference:"+etpref+"\nChecked Preference:"+cpref+"\nList Preference:"+opref);
 }
}


Thus , we got the android preference working , look at the following screen shots to get a better idea :


You can find the project HERE

Dynamic search in Android Database

In my previous post , I explained on how to copy a SQLite database into the android internal memory .
In this , we will learn how use it to access database dynamically .

Prerequisites :

The basic programming in Android
My Previous Post : Using static database with android

So , once we have followed the previous post , for creating a dynamic search we need to do the following :


  1. Set content view to a search layout that will contain a textbox and a list view 
  2. Create a Cursor which is a more like a ResultSet in java
  3. Create a Adaptor that will manage the Cursor (to view)
  4. Set a filter query provider 
  5. Set a text change listener for the edittext which will call the filer set in step 4
  6. Add a OnItemClickListener which will be clicked when a list item is clicked
STEP 1
Define a file called search.xml in res/layout/ which will be in something like the following 


Please note that it is of uttermost importance that the id of the listview is list . 
now , in the activity write the following java code:
 
setContentView(R.layout.search);

STEP 2

Now , we need to define a Cursor using the following java code :
sql=db.getReadableDatabase();
        allcolumns=new String[]{"_id","Firstname||' '||Lastname"};
        selection=null;
        mCursor=sql.query(true, "Contact", allcolumns, selection, null, null, null, null, null);
   startManagingCursor(mCursor);

STEP 3


Now we need to use this mCursor with a adaptor , Adaptor is what will manage the views of the mCursor
  String[] array= {"Firstname||' '||Lastname"};
   adapter = new SimpleCursorAdapter(this, // Context.
  android.R.layout.simple_list_item_1,// Specify the row template
           // to use (here, two
           // columns bound to the
           // two retrieved cursor
           // rows).
    mCursor, // Pass in the cursor to bind to.
    // Array of cursor columns to bind to.
    array,
    // Parallel array of which template objects to bind to those
    // columns.
    new int[] { android.R.id.text1});

for this example we have used a predefined curson adapter named SimpleCursorAdapter , but if we want we can also define our own cursor adaptors .  The comments in the code are self explanatory .

STEP 4

Now we need to define a filter Query Provider which will run a Query on a given character sequence

 adapter.setFilterQueryProvider(new FilterQueryProvider() {
  
   @Override
   public Cursor runQuery(CharSequence s) {
    
    selection="Firstname||' '||LastName like '"+s+"%'" ;
    
    Log.d("Selection Query",selection);
    Cursor c=sql.query(true, "Contact", allcolumns, selection, null, null, null,null,null);
    return c;
  
    
   }
  });
STEP 5
Once the FilterQueryProvider has been defined , the next question arises is when should the filter be executed . So , we know that filter should be executed when the text in editText is change , so :
  et.addTextChangedListener(new TextWatcher() {
   
   @Override
   public void onTextChanged(CharSequence s, int arg1, int arg2, int arg3) {
    adapter.getFilter().filter(s);
    
   }
   
   @Override
   public void beforeTextChanged(CharSequence arg0, int arg1, int arg2,
     int arg3) {


   }
   
   @Override
   public void afterTextChanged(Editable editable) {


   }
  });

STEP 6
Last , but not the least , set a on Item Click Listener which will be executed when a item in the list is clicked :
l1=(ListView) findViewById(R.id.list);
  l1.setAdapter(adapter);
  l1.setOnItemClickListener(new OnItemClickListener() {
   
   @Override
   public void onItemClick(AdapterView arg0, View arg1, int arg2,
     long arg3) {
    Toast.makeText(SqlliteDatabaseSearchActivity.this, arg3+" ", 50).show();
   
   
   }
  });

And , the final product :)


You can find the whole project HERE .
Please note : If the link is broken , please mail me @ tapan.d.thaker@gmail.com . And i will put it back soon . 

Using static Database with Android

While working with android , I wanted to use static SQLite DB . I mean a DB that is created earlier on a PC and then copied to the android and while first launch of the application .

For that , we require a SQLite Database Browser which will help in creating a android compatible SqlLite database . For converting some data to SQLite Database you can use different api's available for different languages , for example I used this SQLite api for C# . All that is required to keep in mind is that each of your table should have a column called "_id" which is a Number and which has unique values . 

Ok , so now lets consider that you got a SQLite Database , to use it for android you need to create a new table called "android_metadata" and it should have a column locale which is a TEXT field , as shown in the image below : 

once you have done this , add a field in your locale  as en_US as shown below  : 

Once this is done , your database is ready to be copied into the android database , easy part is over , now comes the tough part , ie copying it to the android database .

For that , take the SQLite file and put it into a assets folder of your project directory . Now , we need a SqlLiteOpenHelper class which will help us in copying the database into the android .
For this , we define a DatabaseHelper class which extends SQLiteOpenHelper as shown below :
package com.tapan.sqlite;

import java.io.FileOutputStream;
import java.io.IOException;
import java.io.InputStream;
import java.io.OutputStream;

import android.content.Context;
import android.database.SQLException;
import android.database.sqlite.SQLiteDatabase;
import android.database.sqlite.SQLiteException;
import android.database.sqlite.SQLiteOpenHelper;


public class DataBaseHelper extends SQLiteOpenHelper implements Runnable
{

    //The Android's default system path of your application database.
    //DB_PATH should coincide with the [package name]/databases 
 private static String DB_PATH = "/data/data/com.tapan.sqlite/databases/";
    //DB_NAME should be the name of SQLite file
 private static String DB_NAME = "externalcontacts";
    private SQLiteDatabase myDataBase; 
    private final Context myContext;
    public int progress;
    /**
     * Constructor
     * Takes and keeps a reference of the passed context in order to access to the application assets and resources.
     * @param context 
     */
    public DataBaseHelper(Context context) {

     super(context, DB_NAME, null, 1);
     this.myContext = context;
    } 

  /**
     * Creates a empty database on the system and rewrites it with your own database.
     * */
    public void createDataBase() throws IOException{
     //Log.d("Example 1 ","Inside the create DB method ");
     boolean dbExist = checkDataBase();

     if(dbExist){
      //do nothing - database already exist
     }else{

      //By calling this method and empty database will be created into the default system path
               //of your application so we are gonna be able to overwrite that database with our database.
         this.getReadableDatabase();

         try {

       copyDataBase();

      } catch (IOException e) {

          throw new Error("Error copying database");

         }
     }

    }

    /**
     * Check if the database already exist to avoid re-copying the file each time you open the application.
     * @return true if it exists, false if it doesn't
     */
    private boolean checkDataBase(){

     SQLiteDatabase checkDB = null;

     try{
      String myPath = DB_PATH + DB_NAME;
      checkDB = SQLiteDatabase.openDatabase(myPath, null, SQLiteDatabase.OPEN_READONLY);

     }catch(SQLiteException e){

      //database does't exist yet.

     }

     if(checkDB != null){

      checkDB.close();

     }

     return checkDB != null ? true : false;
    }

    /**
     * Copies your database from your local assets-folder to the just created empty database in the
     * system folder, from where it can be accessed and handled.
     * This is done by transfering bytestream.
     * */
    private void copyDataBase() throws IOException{

     //Log.d("Example 1","Trying to copy the new Db");
     
     //Open your local db as the input stream
     InputStream myInput = myContext.getAssets().open(DB_NAME);

     // Path to the just created empty db
     String outFileName = DB_PATH + DB_NAME;
     int total_size=myInput.available();
     total_size=total_size/1024;
     //Open the empty db as the output stream
     OutputStream myOutput = new FileOutputStream(outFileName);
     //transfer bytes from the inputfile to the outputfile
     byte[] buffer = new byte[1024];
     int length;
     while ((length = myInput.read(buffer))>0){
      myOutput.write(buffer, 0, length);
      progress=(total_size-1)*100/total_size;
     }

     //Close the streams
     myOutput.flush();
     myOutput.close();
     myInput.close();
     progress=100;

    }

    public void openDataBase() throws SQLException{

     //Open the database
        String myPath = DB_PATH + DB_NAME;
     myDataBase = SQLiteDatabase.openDatabase(myPath, null, SQLiteDatabase.OPEN_READONLY);

    }

    @Override
 public synchronized void close() {

         if(myDataBase != null)
          myDataBase.close();

         super.close();

 }

 @Override
 public void onCreate(SQLiteDatabase db) {

 }

 @Override
 public void onUpgrade(SQLiteDatabase db, int oldVersion, int newVersion) {

 }

 @Override
 public void run() {
  // TODO Auto-generated method stub
  try {
   createDataBase();
  } catch (IOException e) {
   // TODO Auto-generated catch block
   e.printStackTrace();
  }
 }

        // Add your public helper methods to access and get content from the database.
       // You could return cursors by doing "return myDataBase.query(....)" so it'd be easy
       // to you to create adapters for your views.

}

Now , on your main activity call the database helper to copy the files to the android database using the following code :
   
db=new DataBaseHelper(this);
        try {
   db.createDataBase();
  } catch (IOException e) {
   e.printStackTrace();
  }
        finally
        {
         //finish();
        }
        SQLiteDatabase sql=db.getReadableDatabase();
   mCursor = sql.query("text_messages", new String[]{"_id","sms"}, null, null, null, null, null);


Please note -

  1. This method does not work very well with android 2.1 . According to my experiences , the application stops responding when it is launched for the 1st time (it copies the database into the android internal memory though ) . On second time launch you are able to browse it properly . Probably the problem is that i am using java threading library instead of Async .
  2. If you tend to change the database , then please make sure that you delete the previously copied database using the adb shell and then browsing to the database folder . Else , the application considers the database to be present already and thus doesn't try to copy the previous one .
  3. The project file can be found HERE . Please mail me if the link is broken .